Updated:
22-Sep-2025 | Answer ID:
6298
This is a guide showing the latest version of the Razer Blackshark V2 X USB firmware and the steps to install it successfully.
Applicable Model:
- RZ04-04570
Firmware Updater v1040_r3
- https://rzr.to/5691eD | September 20, 2022
- Fixed audio playback distortion
- Changed knob volume adjustment speed
STEP-BY-STEP PROCESS
Before you start
- If using a laptop, ensure it is plugged into a wall outlet. Do not let it run on battery alone.
- Save any open documents on your computer.
- Close all other programs.
- Download the latest firmware.
Update Process
Note: Ensure your antivirus software is up to date before updating the headset firmware to avoid false positive detection during installation.
-
Run the updater.
-
Click «Yes» if the User Account Control window pops up to proceed.
-
Click «NEXT» to proceed. The updater will close all running Razer applications.

-
Plug in the headset to the PC.
-
Click «UPDATE».
-
Wait until the update process is complete. Do not interrupt.

-
Click «CLOSE» once the update is complete..

Is this answer helpful?
Гарантия на продукции Razer в России
ВНИМАНИЕ: Гарантийное обслуживание оказывается по месту покупки продукции Razer.
Подробнее о гарантии в России можно узнать здесь.
Драйверы и Программы для настроек
Драйверы к устройствам Razer устанавливаются через программу Razer Synapse 3 или программу Razer Synapse 2.0, через эти же программы настраиваются устройства.
- Список всех устройств для Razer Synapse 3 указан здесь
- Список всех устройств для Razer Synapse 2.0 указан здесь
Если на странице продукта не указана совместимость с программой Razer Synapse 3 или Razer Synapse 2.0, то драйвер устанавливается операционной системой и его не нужно скачивать отдельно.
Дополнительные программы (7.1 Surround Sound, THX Spatial Audio, Razer Cortex, Razer Axon, Streamer Companion App, Razer Virtual Ring Light) можно скачать здесь.
Инструкции к устройствам
Инструкции к устройствам Razer можно скачать со страниц товаров, они расположены внизу страницы после технических характеристик.
Техническая поддержка
Техническая поддержка сайта консультирует только по вопросам настройки и подключения продукции Razer, и гарантийным вопросам.
По вопросам получения заказов следует обращаться к операторам отдела заказов.
-
Понедельник — Пятница: с 09:30 до 18:00 МСК
-
Суббота, Воскресенье: выходной.
-
Москва: +7 495 109-87-65
-
Регионы: 8-800-200-28-81 (бесплатный звонок по России)
- Электронная почта store@razer.ru
- Отправить письмо через форму на сайте.
- Чат на сайте расположен внизу каждой страницы сайта.
- Через чат можно заказать обратный звонок.
- Чат временно не доступен в мобильной версии сайта.
- «Заявка в сервис интернет-магазина Razer»
- Ответы на вопросы (FAQ) на русском языке по продукции Razer находится здесь. Эта группа не является официальной технической поддержкой, но там содержится много полезной информации и решений различных вопросов.
Регистрация на сайтах Razer
Обратите внимание, что регистрация на сайтах www.razer.ru и www.razer.com разная:
- На RU сайте www.razer.ru регистрация только для покупок в фирменном интернет-магазине Razer в России.
- На COM сайте www.razer.com регистрация для получения Razer ID, регистрации продукции и авторизации в программах (Synapse, Cortex).
Device information
Name
BlackShark V2 Pro
Manufacturer
Razer
Type
Human interface device
Hardware IDs
USB\VID_1532&PID_0528&MI_03
USB\VID_1532&PID_0555&MI_03
Show all
Driver Fusion
Automatically update and back up drivers
67 available drivers
Show all
BlackShark V2 Pro
Windows 11, 10, 8.1, 8, 7
x64
BlackShark V2 Pro
Windows 11, 10, 8.1, 8, 7
x64
BlackShark V2 Pro
Windows 11, 10, 8.1, 8, 7
x64
BlackShark V2 Pro
Windows 11, 10, 8.1, 8, 7
x64
BlackShark V2 Pro
Windows 11, 10, 8.1, 8, 7
x64
BlackShark V2 Pro
Windows 11, 10, 8.1, 8, 7
x64
BlackShark V2 Pro
Windows 11, 10, 8.1, 8, 7
x64
BlackShark V2 Pro
Windows 11, 10, 8.1, 8, 7
x64
BlackShark V2 Pro
Windows 11, 10, 8.1, 8, 7
x64
BlackShark V2 Pro
Windows 11, 10, 8.1, 8, 7
x64
BlackShark V2 Pro
Windows 11, 10, 8.1, 8, 7
x64
BlackShark V2 Pro
Windows 11, 10, 8.1, 8, 7
x64
BlackShark V2 Pro
Windows 11, 10, 8.1, 8, 7
x64
BlackShark V2 Pro
Windows 11, 10, 8.1, 8, 7
x64
BlackShark V2 Pro
Windows 11, 10, 8.1, 8, 7
x64
BlackShark V2 Pro
Windows 11, 10, 8.1, 8, 7
x64
BlackShark V2 Pro
Windows 11, 10, 8.1, 8, 7
x64
BlackShark V2 Pro
Windows 11, 10, 8.1, 8, 7
x64
BlackShark V2 Pro
Windows 11, 10, 8.1, 8, 7
x64
BlackShark V2 Pro
Windows 11, 10, 8.1, 8, 7
x64
BlackShark V2 Pro
Windows 11, 10, 8.1, 8, 7
x64
BlackShark V2 Pro
Windows 11, 10, 8.1, 8, 7
x64
BlackShark V2 Pro
Windows 11, 10, 8.1, 8, 7
x64
BlackShark V2 Pro
Windows 11, 10, 8.1, 8, 7
x64
BlackShark V2 Pro
Windows 11, 10, 8.1, 8, 7
x64
BlackShark V2 Pro
Windows 11, 10, 8.1, 8, 7
x64
BlackShark V2 Pro
Windows 11, 10, 8.1, 8, 7
x64
BlackShark V2 Pro
Windows 11, 10, 8.1, 8, 7
x64
BlackShark V2 Pro
Windows 11, 10, 8.1, 8, 7
x64
BlackShark V2 Pro
Windows 11, 10, 8.1, 8, 7
x64
BlackShark V2 Pro
Windows 11, 10, 8.1, 8, 7
x64
BlackShark V2 Pro
Windows 11, 10, 8.1, 8, 7
x64
BlackShark V2 Pro
Windows 11, 10, 8.1, 8, 7
x64
BlackShark V2 Pro
Windows 11, 10, 8.1, 8, 7
x64
BlackShark V2 Pro
Windows 11, 10, 8.1, 8, 7
x64
BlackShark V2 Pro
Windows 11, 10, 8.1, 8, 7
x64
BlackShark V2 Pro
Windows 11, 10, 8.1, 8, 7
x64
BlackShark V2 Pro
Windows 11, 10, 8.1, 8, 7
x64
BlackShark V2 Pro
Windows 11, 10, 8.1, 8, 7
x64
BlackShark V2 Pro
Windows 11, 10, 8.1, 8, 7
x64
BlackShark V2 Pro
Windows 11, 10, 8.1, 8, 7
x64
BlackShark V2 Pro
Windows 11, 10, 8.1, 8, 7
x64
BlackShark V2 Pro
Windows 11, 10, 8.1, 8, 7
x64
BlackShark V2 Pro
Windows 11, 10, 8.1, 8, 7
x64
BlackShark V2 Pro
Windows 11, 10, 8.1, 8, 7
x64
BlackShark V2 Pro
Windows 11, 10, 8.1, 8, 7
x64
BlackShark V2 Pro
Windows 11, 10, 8.1, 8, 7
x64
BlackShark V2 Pro
Windows 11, 10, 8.1, 8, 7
x64
BlackShark V2 Pro
Windows 11, 10, 8.1, 8, 7
x64
BlackShark V2 Pro
Windows 11, 10, 8.1, 8, 7
x64
BlackShark V2 Pro
Windows 11, 10, 8.1, 8, 7
x64
BlackShark V2 Pro
INF files:
rz0528dev_win8 .inf, rz0555dev.inf
Windows 11, 10, 8.1, 8, 7
x64
BlackShark V2 Pro
Windows 11, 10, 8.1, 8, 7
x64
BlackShark V2 Pro
INF file:
rz0528dev_win8.inf
BlackShark V2 Pro
INF file:
rz0528dev_win8.inf
BlackShark V2 Pro
INF file:
rz0528dev_win8.inf
BlackShark V2 Pro
INF file:
rz0528dev_win8.inf
BlackShark V2 Pro
INF file:
rz0528dev_win8.inf
BlackShark V2 Pro
INF file:
rz0528dev_win8.inf
BlackShark V2 Pro
INF file:
rz0528dev_win8.inf
BlackShark V2 Pro
INF file:
rz0528dev_win8.inf
BlackShark V2 Pro
INF file:
rz0528dev_win8.inf
BlackShark V2 Pro
INF file:
rz0528dev_win8.inf
BlackShark V2 Pro
INF file:
rz0528dev_win8.inf
BlackShark V2 Pro
INF file:
rz0528dev_win8.inf
BlackShark V2 Pro
INF file:
rz0528dev_win8.inf
BlackShark V2 Pro
INF file:
rz0528dev_win8.inf
Download this driver with Driver Fusion
The best software to update, backup, clean, and monitor the drivers and devices of your PC.
Automatically update and back up drivers
Regularly check for device and driver issues
Uninstall disconnected devices
Monitor device performance
Unlimited priority support
Most people who use a Windows PC opt for an external device for listening and speaking. This is because the default audio speakers and mic built into a laptop or desktop are not very efficient. An external gadget is always easy to use and provides an overwhelming experience. One such astonishing audio device is the Razer BlackShark V2 Mic. However, we have recently identified that some users are complaining about the Razer BlackShark V2 Mic Not Working On Windows 11/10. And that is why we have crafted this guide to fix the issue once and for all.
Causes:
There could be many reasons why the Razer BlackShark V2 Mic does not work on your PC. We have listed a few common ones.
- The audio drivers are missing, corrupted, or outdated.
- The Razer mic is not set as the default device on Windows PC.
- Misconfigured audio settings.
- The Mic is disabled for some apps.
Ways to Fix Razer BlackShark V2 Mic Not Working on Windows PC
Method 1: Check The Mute Button On The Headset
Before we begin troubleshooting the Windows OS, it is advised to physically check if there is a Mute button on the headset itself. Press the button to toggle the Mute node on and off.
Tip : Check the Mic on another device to ensure that there are no issues with the hardware.
Method 2: Verify The Sound Settings
Experts suggest that setting any device as the default device can solve most of the problems.
Here are the steps on how to set the Razer BlackShark V2 Mic as a default device on your PC.
1. Press Win + R to launch the RUN box.
2. Type Control in the text box and press Enter.

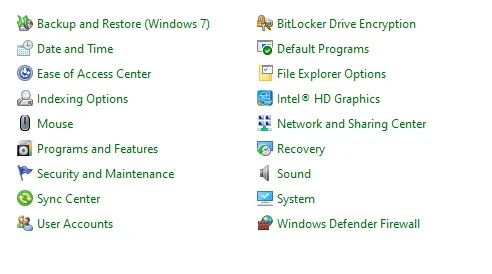
3. In the Control Panel box, click on View by and select Large Icons.
4. Select Sound from the options, and a new window will open.
5. Click on the Recording tab.
6. Right-click on the empty space inside the box and check the box beside Show Disabled Devices.
7. Now, right-click the Headset Microphone option and select Enable.
8. Right-click again and select Set as Default Device. The Razer BlackShark V2 Mic is now enabled and set as a default device.
Method 3 : Update Headset Drivers
If setting the Razer BlackShark V2 Mic as the default did not help to fix the issue, then you can try to update the drivers. There are three methods to do that, and we have explained all three methods in detail. Here is what you need to do.
a.) Original Equipment Manufacturer Website
Navigate to the official website of Razer BlackShark V2 Mic and search for the model of your device. Download the appropriate driver and install it to working again Razer BlackShark V2 Mic on your PC.
b.) Device Manager
The Device Manager is a built-in driver updater tool from Microsoft. It can help update outdated drivers for free. Here are the steps to use this tool.
1. Press Win + X to launch the Power Menu.
2. Select Device Manager.
3. Expand Sound, Video, and Game Controllers to reveal your headset.
4. Right-click on the Razer BlackShark V2 Mic and select Update Drivers.
5. Select Search Automatically for drivers and adhere to the on-screen instructions.
c.) Advanced Driver Updater
The Advanced Driver Updater is an amazing third-party driver updater program that detects all driver anomalies like outdated drivers, missing and corrupted drivers, and incompatible drivers. With a few mouse clicks, this software can download and update all your drivers.
1. Download and install Advanced Driver Updater on your system using the link below.
2. Open the Program and click on the Start Scan Now button.

3. A list of driver anomalies will appear on your screen.
4. Click the Update button next to Razer BlackShark V2 Mic and follow the steps.
5. After completing the driver update process, restart your computer.
Method 4: Run The Audio Troubleshooter
After updating the drivers, the next step recommended by experts is to run the troubleshooter designed for Audio issues. Here are the steps.
1. Press Win + I to launch the Windows Settings.
2. Click on the System tab in the left panel.
3. Click on the Troubleshoot option in the right section.

4. Now, click on Other Troubleshooters.

5. Next, find Audio Troubleshooter and click RUN next to it.

6. Follow the instructions to fix the Razer BlackShark V2 Mic not working on Windows 11/10.
Method 5: Enable Microphone Access
Windows includes a setting where the Microphone can be disabled for some apps. Check that setting and enable if necessary.
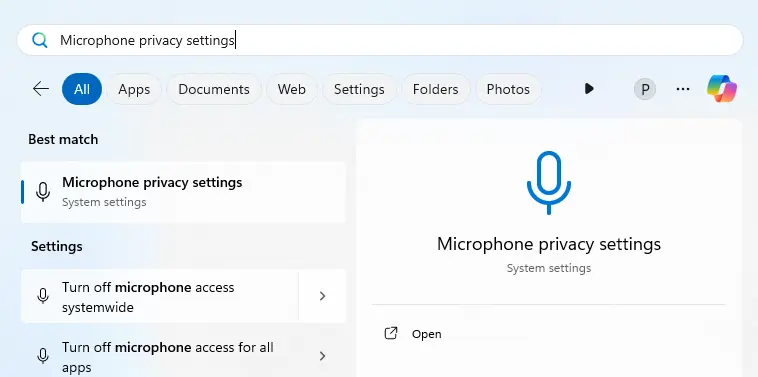
1. Press Win + S to open Windows Search.
2. Enter Microphone privacy settings and click the matching result under Best Match.
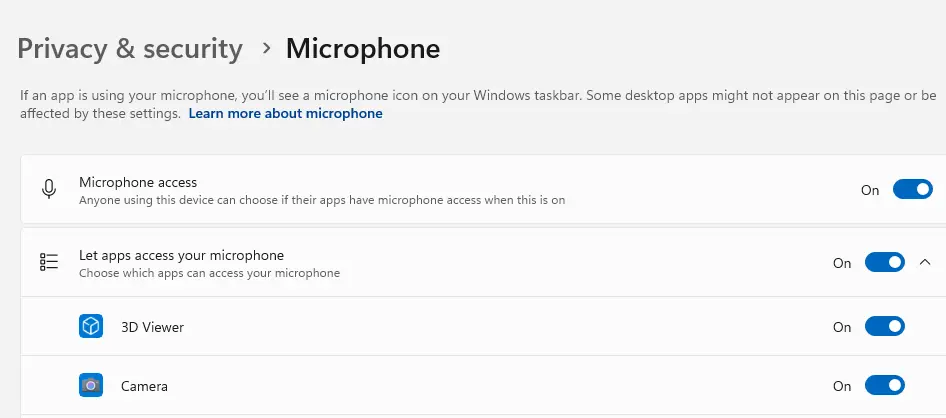
3. Make sure the toggle button beside the Microphone Access is enabled.
4. Verify if the app you are trying to use the Mic with has the toggle button turned on as well.
5. Check if the Razer BlackShark V2 Mic working, and if it has been fixed or not.
Method 6: Restart Windows Audio Service
Windows include Services for all functions. If the Audio service is disabled, then you may not be able to hear any sound. Here are the steps to toggle the service functionality.
1. Press Win + R to open the launch box.
2. Type “Services.msc” and click on the Enter key.
3. A new box will open with a list of Services listed.

4. Search for Windows Audio and right-click to view the context menu.
5. Choose Restart and exit the Services window.
Method: 7 Configure the Mic in Razer Synapse
If you’re using the Razer USB sound card, then follow these steps.
1. Open Razer Synapse.
2. Go to Audio → Microphone.
3. Ensure the mic is enabled and the volume is not muted or too low.

4. Adjust Mic Sensitivity and Ambient Noise Reduction if needed.
Method 8: Disable “Exclusive Mode”
Sometimes, exclusive app control can block mic input. Use the following steps to disable this mode.
1. In Sound settings, go to Recording → Razer BlackShark V2 → Properties → Advanced.
2. Uncheck these options – “Allow applications to take exclusive control of this device” &
“Give exclusive mode applications priority”.
3. Click Apply → OK.
Method 9: Manually Select USB Sound Card as Input
If your headset uses a 3.5mm connector with the included USB dongle.
1. Open Sound Settings → Input → Choose a device for speaking or recording.
2. Manually select the Razer USB Sound Card.
Method 10: Reinstall Razer Synapse and Razer Drivers
1. Uninstall Razer Synapse and Razer drivers from the Control Panel.
2. Reboot your PC.
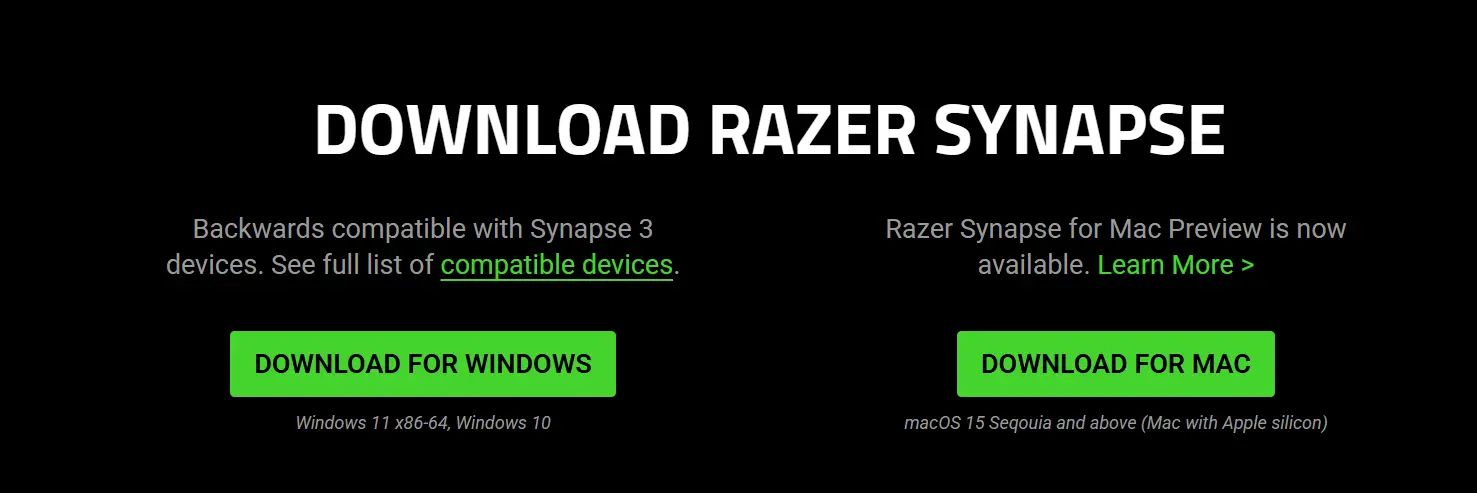
3. Download and install the latest version of Razer Synapse 3 from the official website.
4. Connect your headset again and reconfigure the mic settings.
Method 11: Reset Windows
Moving on, we recommend that you reset the Windows OS on your PC. This will clear all conflicting files, glitches, and bugs and refresh your Windows. You can choose the option where you do not lose any files. But we still recommend that you take a backup of your files and folders before commencing this process.
1. Press Win + I to open the Settings window.
2. Click on the system tab in the left section.
3. Next, click on the Recovery tab in the right panel.
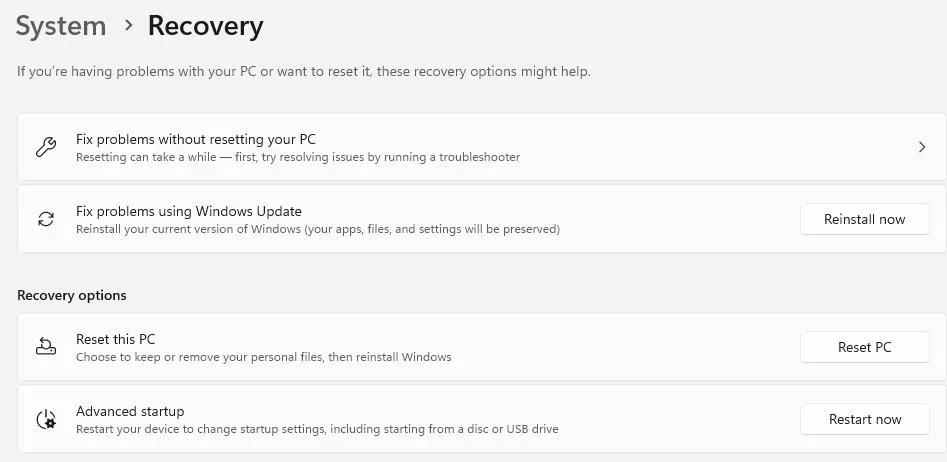
4. Click the Reset PC button and select the Keep My Files option in the next window.
5. Follow the instructions to reset your PC.
Are You Able To Use The Razer BlackShark V2 Mic?
Many people have bought and used the Razer BlackShark V2 Mic and provided positive reviews and comments. Generally, there are no issues with the hardware. The issue mostly lies within the settings of the Windows PC. We have explained all the troubleshooting steps and changes you need to canary out if the Razer BlackShark V2 Mic is not working on Windows 10/11.
Recommended :
How to Fix Razer Kraken Mic Not Working on Windows 11
How To Fix Astro a50/a40 Mic Not Working